Motorised Timelapse Slider
Posted: 16 January 2015
I can't remember when I first decided I wanted to shoot a timelapse on a slider, probably, I suppose when I first saw a timescape video several years ago. In March last year I bought a Konova K2 800mm slider from Amazon. Now I need to motorise it!
Initially I found an article from Angus Kennedy who had managed to motorise a slider using some DC motors and high strength fishing line. After buying all the components he listed, and having a play around I quickly decided that the fishing line approach wasn't going to be precise enough for what I wanted, it stretched slightly when being pulled and the resulting timelapse wasn't as smooth as I wanted.
I knew the best solution would be a belt drive, this was how most professional sliders worked, my concern was how I would mount a belt onto the slider. The only mounting points were a single 1/4-20 UNC thread at each end.

Above you can see the actual "back of the envelope" designs my brother drew for the fixings I would need to attach the belt to the slider dolly, and to hold a free spinning pulley at one end of the slider.
While I was waiting for my brother to cut the pieces from 2mm thick steel, I put together a solution to mount the motor, I decided to use a stepper motor for increased precision (using an Adafruit motor shield V2 so I could still easily control it from the Arduino.)
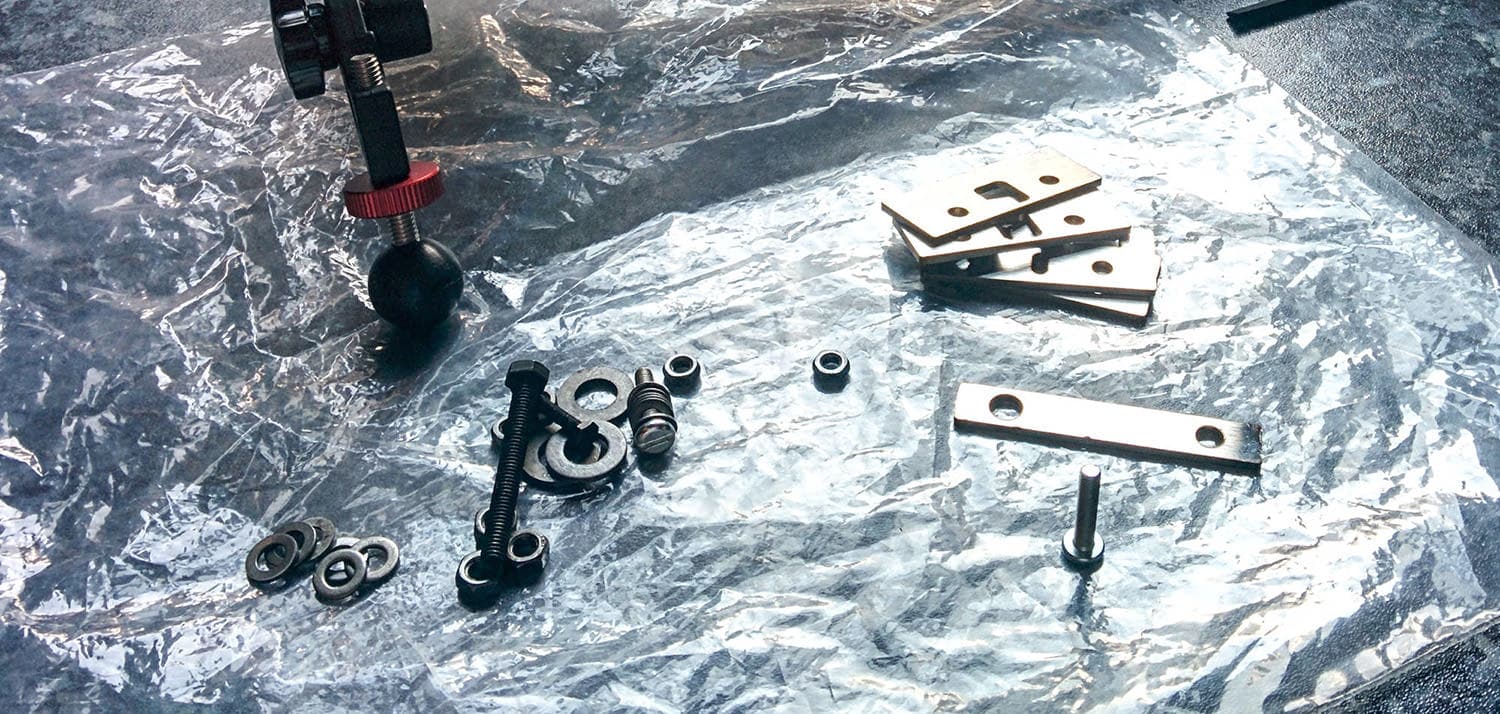
Once I had the parts, I began mounting a free spinning pulley to the opposite end of the slider, preventing the assembly loosening proved quite a challenge but I eventually solved this by mounting the plate onto the bolt, and epoxying that assembly together, I could then remove the plate for transport.
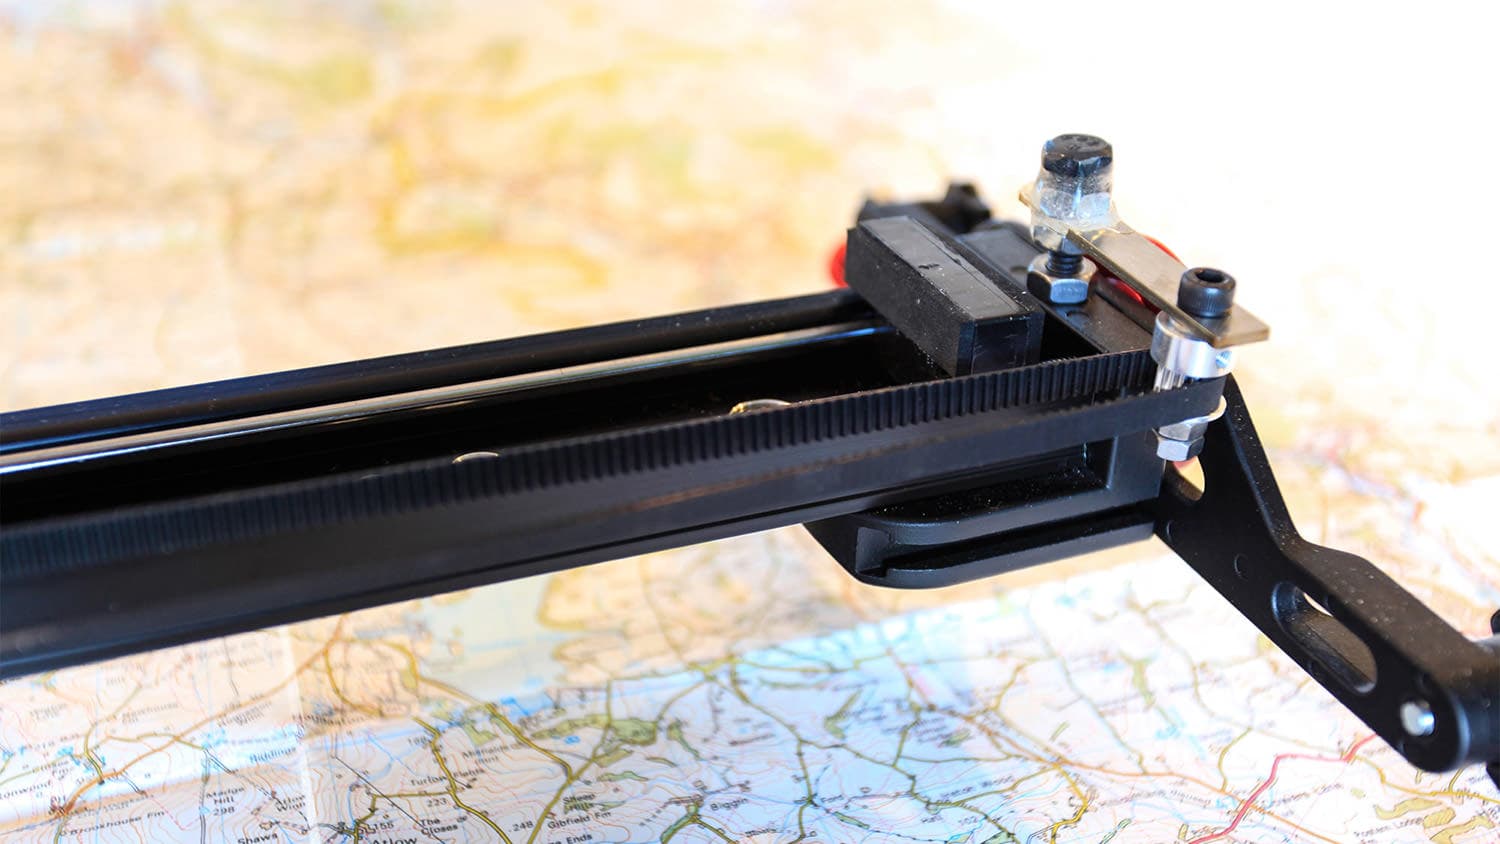
The dolly has a single threaded hole, and two proud lugs, the first steel plate had cutouts for the lugs ensuring it wouldn't move, this was bolted onto the dolly. The second plate would then be bolted to the first, with the belt sandwiched between the two.

I ran the belt around the motor (shown below) and the free spinning pulley, and secured both ends between the steel plates, all that was left to do was program the Arduino I would be using to drive the stepper motor.
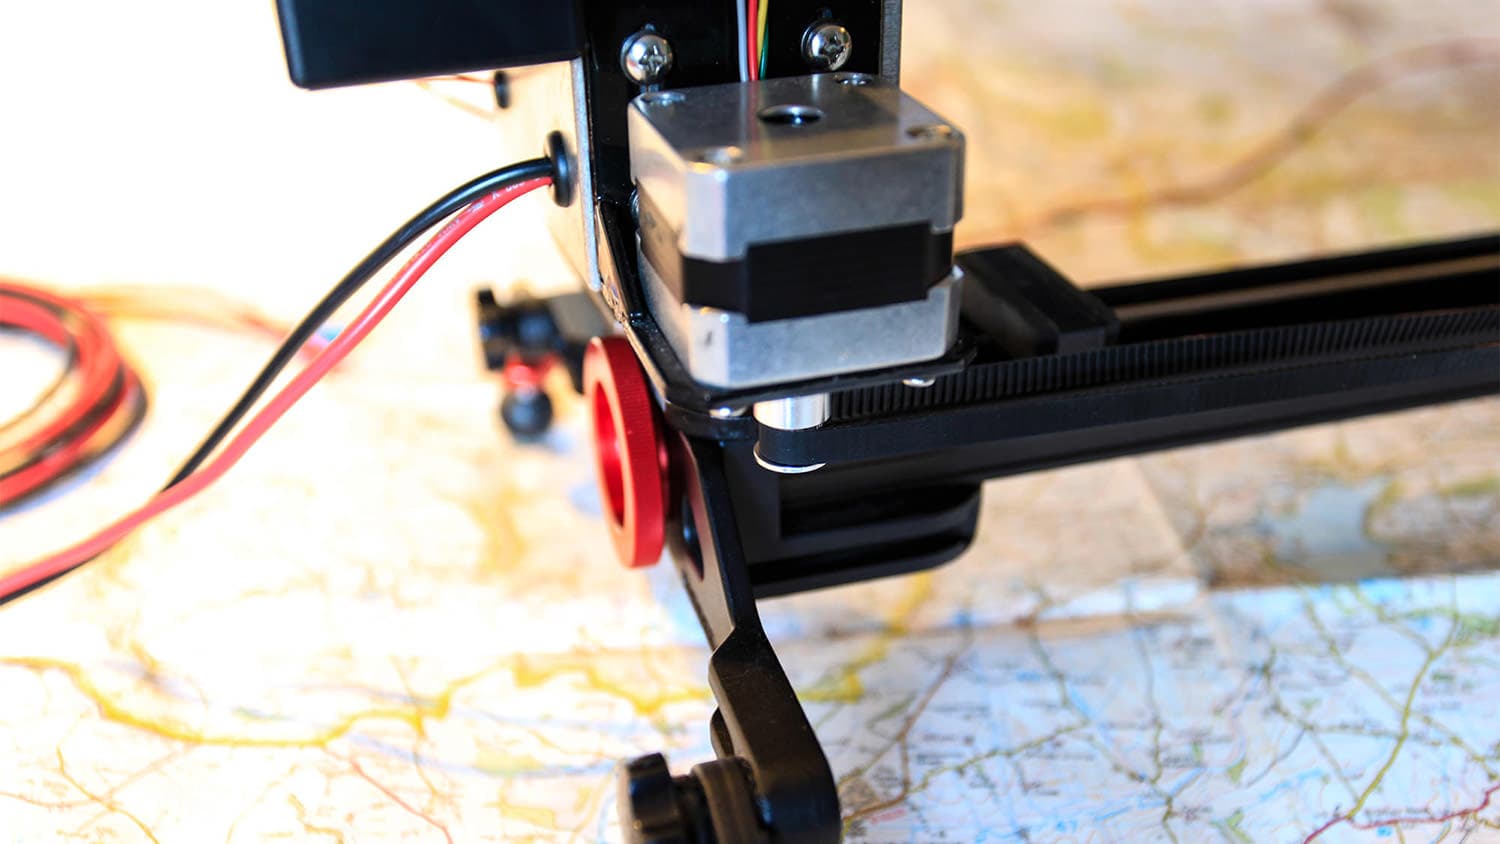
I programmed the Arduino Uno I had and got the slider moving I also wired up a trigger lead for my camera so I could trigger the shutter by putting a pin of the Arduino high (using an opto-isolator between the two.)
Before long I was in the garden taking a timelapse of some ants.
However I was frustrated because in order to change any settings with the slider you had to connect to Arduino to my laptop, change the values and push the compiled code back to the Arduino. This was a pain and I didn't have the motivation to come up with a solution, so the slider remained in a box until a few weeks ago.
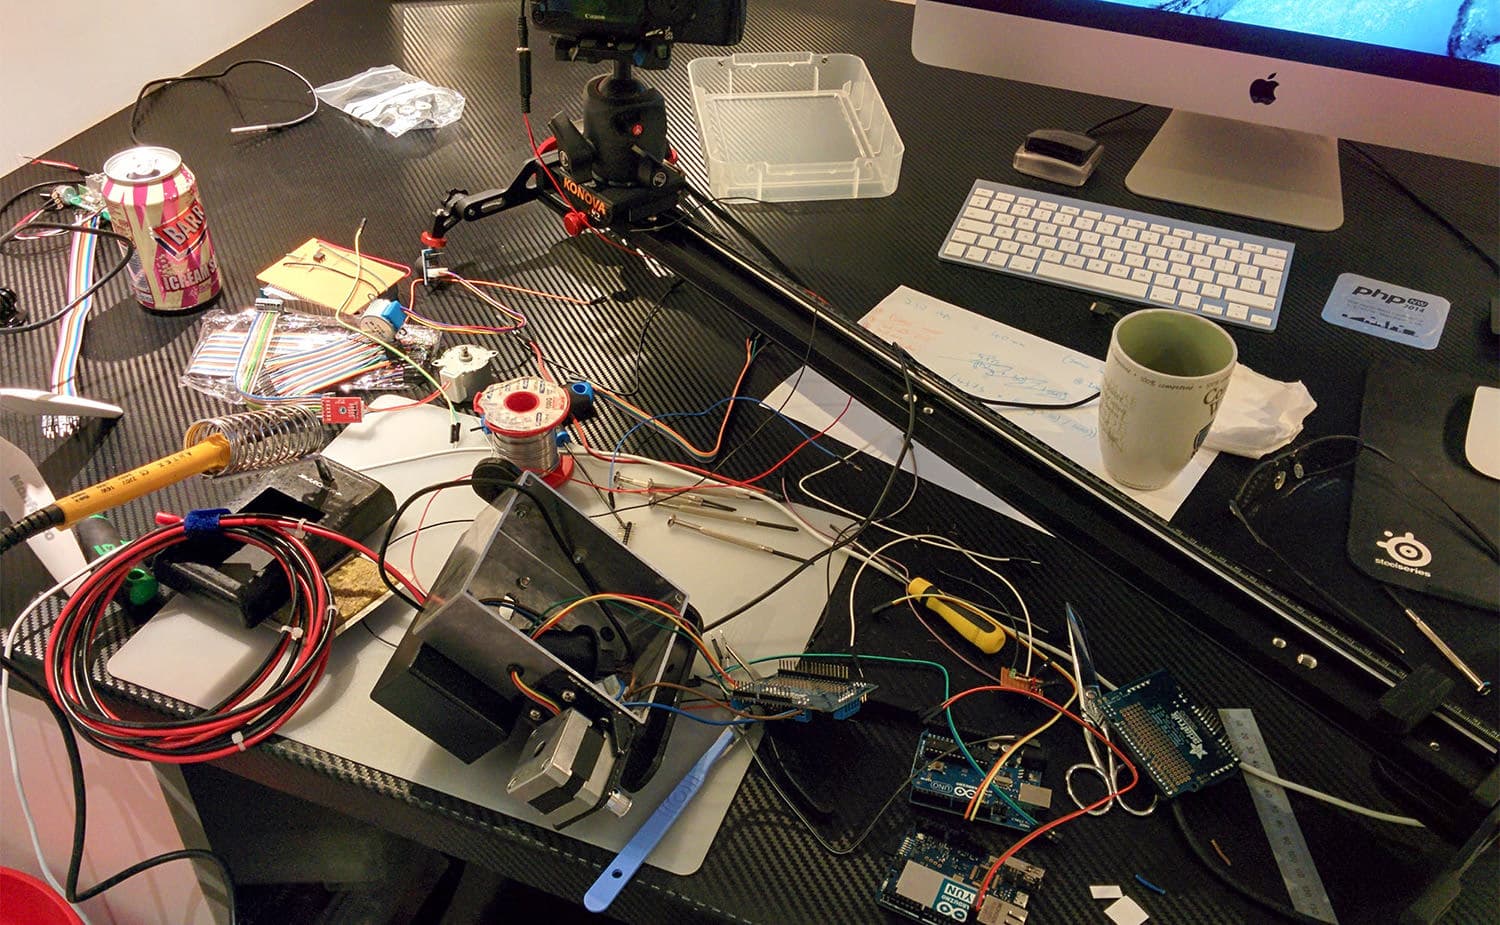
I got the slider out and quickly my desk was covered in components, I bought a 12V to USB adaptor which I would use to power the Arduino, I also bought an Arduino Yun which has a second processor running linux, this means you can run a simple web interface and pass commands to the Arduino using a REST API.
RUN_COUNT++;

// Trigger shutter
delay(SHUTTER_SHUDDER_DELAY);
digitalWrite(SHUTTER_PIN, HIGH);
delay(SHUTTER_DELAY);
digitalWrite(SHUTTER_PIN, LOW);
delay(DELAY);

// Move slider
sliderMotor->step(STEPS_PER_RUN, FORWARD, DOUBLE);
Above is an excerpt from the source code.
Most tutorials will show you how to configure the Yun so it connects to a local WiFi network, this is not what I wanted as there would be no WiFi out where I wanted to use the slider, and tethering to my phone was just a headache. However you can use the Arduino as an access point (which is it's default state) my workflow now looked like this:
- Connect to the Arduino access point
- Browse to
arduino.local/sd/slider - Configure the slider options
- Press start
That was now all I needed to do to configure the slider in the field, I could also stop the slider, and reset it's position, have a look at how to configure the slider.
Today the weather was nice enough to have a proper play with the slider, I went with my mum to Curbar Edge, a 20 minute drive from where I live, below is the result, I hope you like it.